Podcasting From Home – Part One: Managing Your Sound
The new normal – I’m sick of the phrase, I’m sure you are too. The only trouble is, for most of us, it’s a useful way of summing up the fact that life is going to be quite different for some time to come.
And when it comes to recording a podcast, being able to put four or five people in a small studio underground somewhere – or even across a table indoors – is very much not normal right now and won’t be for a while.
So, if you don’t want to make sacrifices when it comes to getting the best guests on your podcast, you’re going to need to embrace podcasting remotely.

Cushions are great for DIY soundproofing when recording at home
The good news is that the technology to allow you to do this has been there for a while. But like most of us had to get our heads around video conferencing, so too are some podcasters who are interviewing their guests remotely for the first time.
There are a number of considerations you need to make when it comes to recording a podcast without leaving your home – what audio software to use, how to prep your guest – and we’ll cover these later in this series of blogs.
But let’s start with managing your sound, which is all about the right kit but also putting your pillows and cushions to good use.
The Kit
The basic needs for a professional sounding podcast are no different in lockdown than in normal times – you start with a microphone. Only, this time, if you start with a USB microphone, you’re flying. All you have to do is plug that microphone into your laptop / desktop USB port and you’re ready.
There are lots of great USB mics on the market – the Rode Podcaster, the Blue Yeti – and there are lots of great blogs out there that review them. At Bengo, we tend to flip between two dynamic microphones: the Audio Technica ATR 2100 and the Samson Q2U. Both are dual function USB and an XLR mics which achieve great sound close-up and ignore a lot of background noise. The Samson retails at around £70 and usually comes with a mic stand, windshield and the wires you need to get going.

The back-end of an XLR mic
Bear in mind that some laptops have now switched to USB C, so check the spec – you may need to purchase an adapter.
Don’t have an USB mic but have an XLR mic? Or if you don’t speak the lingo, have a mic and the bottom of it looks like the picture on the left?
…then you’re going to need a USB Audio Interface to connect to your laptop or desktop. If you use a digital audio recorder, like a Zoom H4, 5 or 6, you can connect using that. If you do need to buy, have a look at the Focusrite Scarlet range.
Finally, a quick word on headphones. You need headphones. It’s important you know what you sound like through a microphone and it’s essential to hear what your guest sounds like too. Try and get closed-back headphones, as it will stop the sound of your guest bleeding back into your microphone. You could spend the earth on great headphones, but there are plenty of decent budget options available too starting at around a tenner.
The Set Up
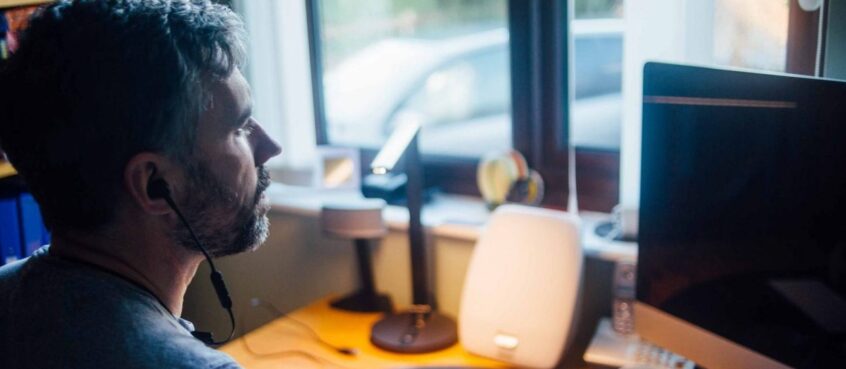
Once you’ve got your tech sorted, then it’s just about managing the sound around the microphone as best you possibly can. You’re not in a studio but the closer you can make it sound like that, the better. And to be honest, the more work you can do to soundproof, the less you may need to spend on kit.
Firstly, pick your recording space carefully. Soft surfaces are your friend here as they stop the sound bouncing around. Recording on, or next to, a sofa will give you a better sound than just a room with hard surfaces. Start with the table your mic is on: cover it with a towel or a blanket to avoid picking up the bangs and crashes your fingers make when you fidget or gesture during a recording. Having your mic stand on books so it’s at the right level for your mouth also has the dual effect of absorbing vibrations and stopping you get backache!
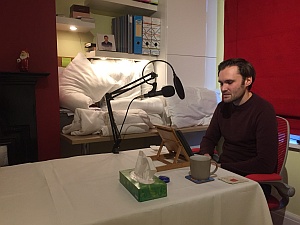
Soundproofing a space at home to record Anti-Sell, an audiobook by Steve Morgan
If you £50-60 to hand, you could invest in a microphone isolation shield, which provides a semi-circle of soundproofing around the back and sides of the mic.
If you don’t, that’s where your pillows and cushions come in handy, just plonk them around the areas you’re recording – like Steve Morgan did when recording his Audiobook, Anti-Sell. You can hear a snippet here just get an impression of the quality of sound which is possible with a DIY home recording.
And if you are recording close to a window, then you can improve the sound even more by closing the curtains or blinds.
Alternatively, you could always stick your head under a duvet. No, really. With coronavirus causing all sorts of havoc for broadcast at the moment, you would be surprised how many radio presenters are literally just taking their microphones underneath their duvets and wrapping it over their heads – it’s simple but incredibly effective for providing a studio sound!

A naked picture of Lee Evans’ duvet fort for his Making Good podcast
If you want to go the extra mile, you could construct yourself a little duvet studio, as podcaster Lee Evans has done. Lee was struggling with acoustics, so constructed a wooden frame for his duvet to drape over when he is ready to record. Coupled with his mic isolation shield, Lee is now achieving a fantastic sound for his podcast, Making Good.
In the next blog post, I’ll talk about how to get the very best sound at your guest’s end of the line, before moving onto some software options to capture your recording.
Find out more about our podcast services, including help with recording, editing and publishing your podcast.